Monday 30 July 2012

Servicing brakes

Disc brakes

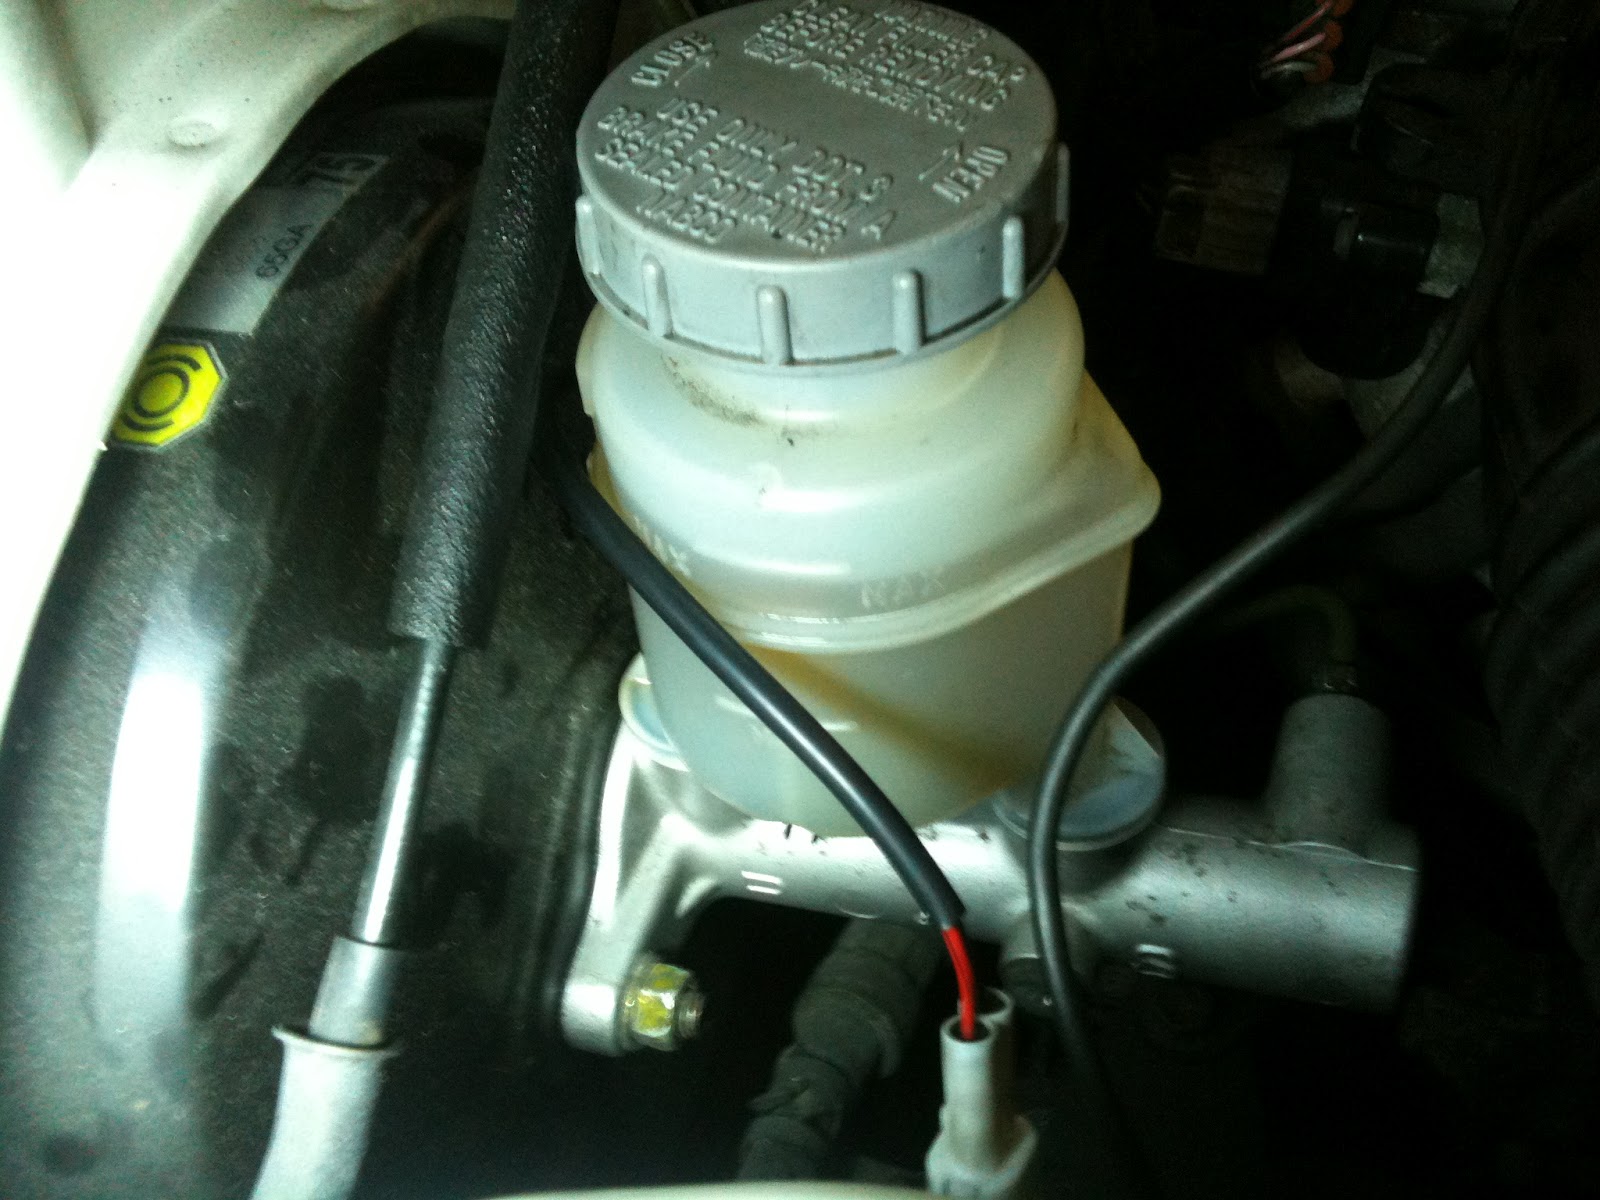
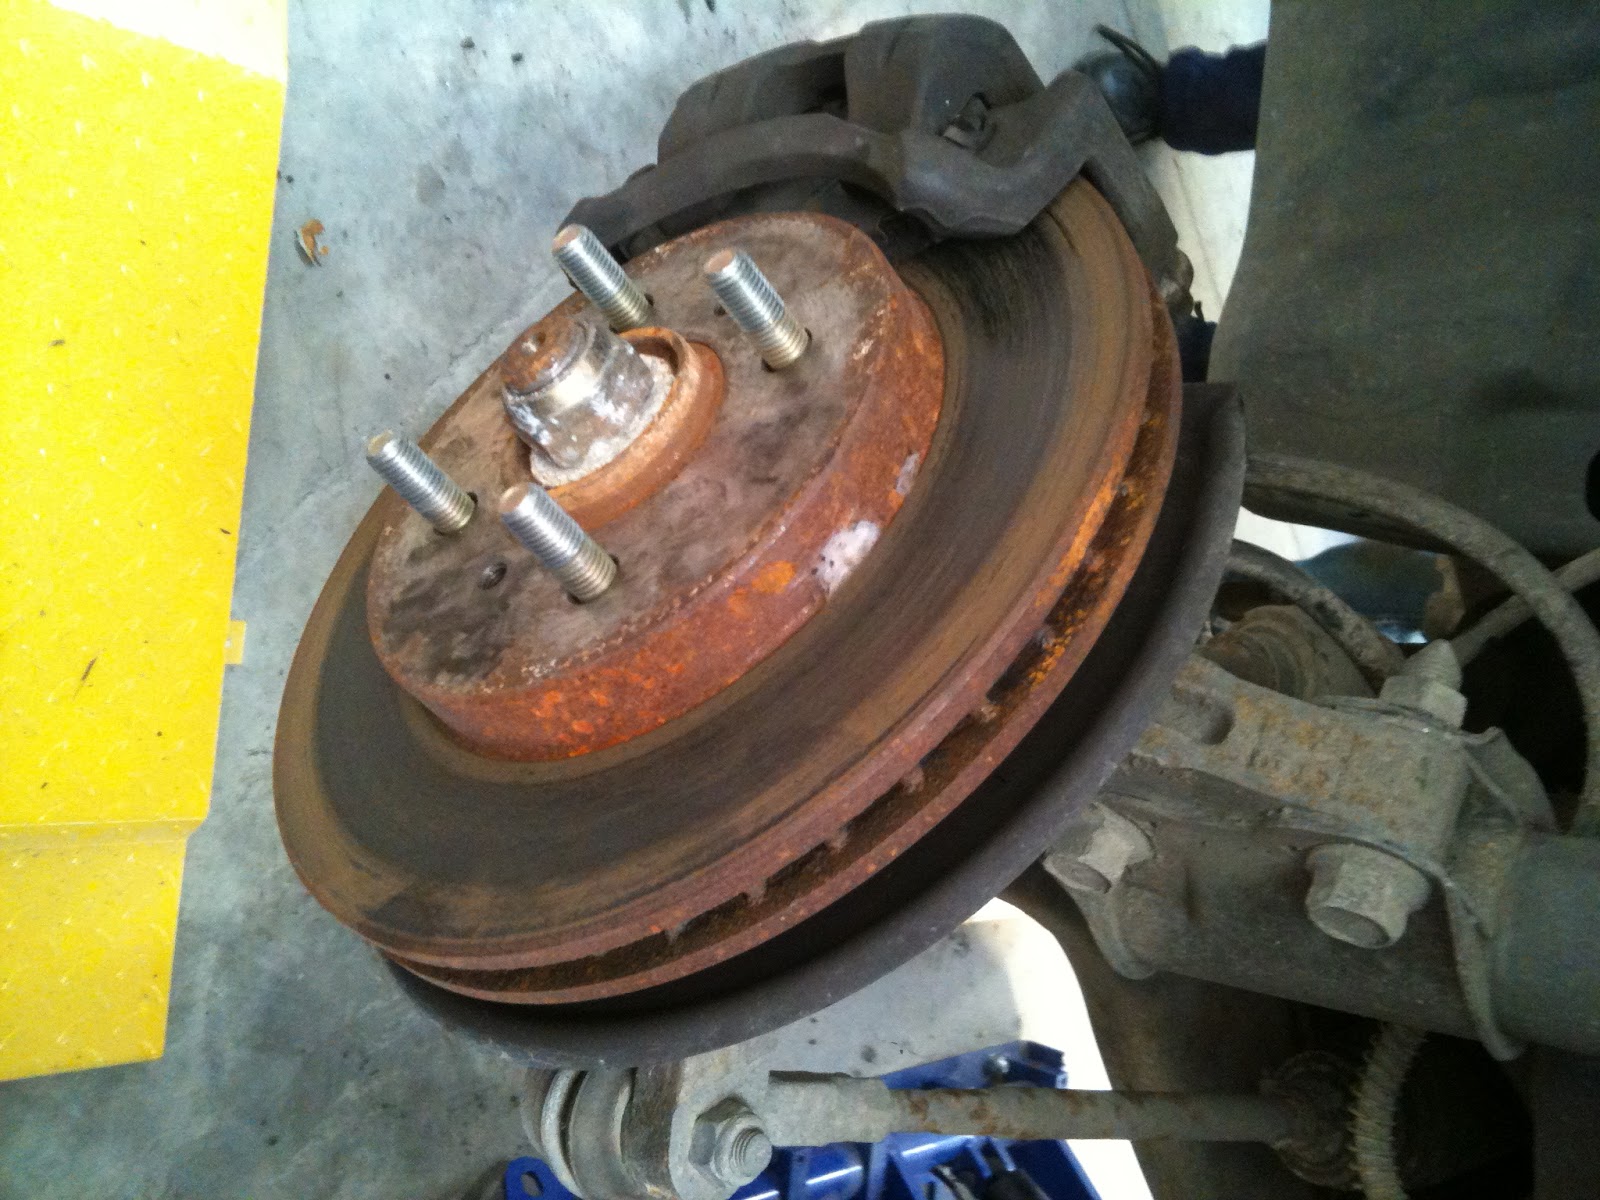
If the brake pads need replacing, loosen the sliding bolts and remove the bottom one. Then lift the caliper up  and the pads will be able to slide out. The brake pads can be measured to see if they can be used again. Use a DTI gauge to check if the rotor is warped or not. If the rotor is worn then the inside and outside of it should be measured with a micrometer, the measurements should be compared to specifications. If it is worn and with in the specified thickness then it can be machined if it is not or if it is warped then it will need to be replaced. Once the rotors have been replaced the new brake pads can be replaced. The new brake pads obviously have more lining than the old ones so the slave/caliper pistons need to pushed back this can be done with a G clamp or by clamping the brake hose and opening the nippple so that it can be pushed back by hand. Before the pads are fitted make sure they are correct and remember to replace any shims and anti squeal plates. An anti squeal spray may also be sprayed onto the back of the pads. Once every thing has been put back into place the caliper and sliding bolts should be torqued to the correct setting.

If one of the rotors in the front is warped the driver will feel it in the steering  wheel  if one in the back is warped the whole car will vibrate.


Drum brakes


To remove drum brakes make sure that the cars handbrake is off. Then either hit it with a brass hammer or put two bolts in and turn them until the drum comes off. Once it has been opened check under the dust seals to see if the pistons are leaking then clean it with brake cleaner or water to get rid of the brake dust. Then using a screw driver  to move the pads from side to side to make sure that the pistons that activate the brakes are not jammed. Then measure the thickness of the brake shoes and check the inside of the drum. If the drum is worn inside it will need to be machined. Before getting it machine measure the inside diameter of the drum and check it with the specifications. Once the all the checks have been done and it has been repaired if necessary the brakes need to be adjusted by turning the nut on the spreader until the brakes are in the right position. the last thing to do is to adjust the handbrake cable.


Wednesday 25 July 2012

The breaking system

When the break pedal is depressed it pushes the piston in the master cylinder forward. The master cylinder pushes the break fluid through the break lines and into the slave cylinders that push the break shoes against the rotors.

The force applied by driver alone is not enough to stop the vehicle therefor the car uses mechanical systems to multiply the force. The first multiplication is mechanical advantage (leverage) by the pedal. The next multiplying step is the break booster which uses vacuum from the engine to increase the force applied. Then the hydraulic system also multiplies the the force by having the master cylinder smaller than the slave cylinders. If the master cylinder is smaller than the slave the master cylinder moves more than the slave but the slave will have more force as it has a larger surface area.

The friction between the break shoes and the rotors convert kinetic energy into heat energy. The wheels lose kinetic energy therefor the vehicle loses kinetic energy too (slows down).


Jacking up a car (safely)

When jacking up a car it is important to make sure that the area on the ground is level and smooth. If the area on the ground is not level the car may roll back and slip off the jack. If the ground is not smooth the jack's small wheels could get stuck and as the jack goes up the jack will pull away from the jacking point, it could cause the vehicle will slip off.

It is important to put the car in park and put the handbrake up so that the car will not roll backwards or forwards off the jack. For extra safety something could be placed behind the wheels. Before jacking up the car make sure that the jack is in the right position (90 degrees to the wheels) and that it is under a suitable  jacking point where it will not damage the car or be likely to slip of. Once the car has been jacked up put axle stands in as far away from the center as possible to increase the vehicle's stability. Lower the jack so that the vehicle rests on the axle stands. The jack may be left in place as an extra precaution but the handle should be lifted up as far as possible so that other people do not trip over it. Once the car has been jacked up give the vehicle a "shake" to make sure that it is secured before going under it.